Microsoft WordPad, launched in 1995 as a word processor for basic file editing and formatting, is finally being removed from all editions of Windows, starting with Windows 11, version 24H2, and Windows Server 2025.
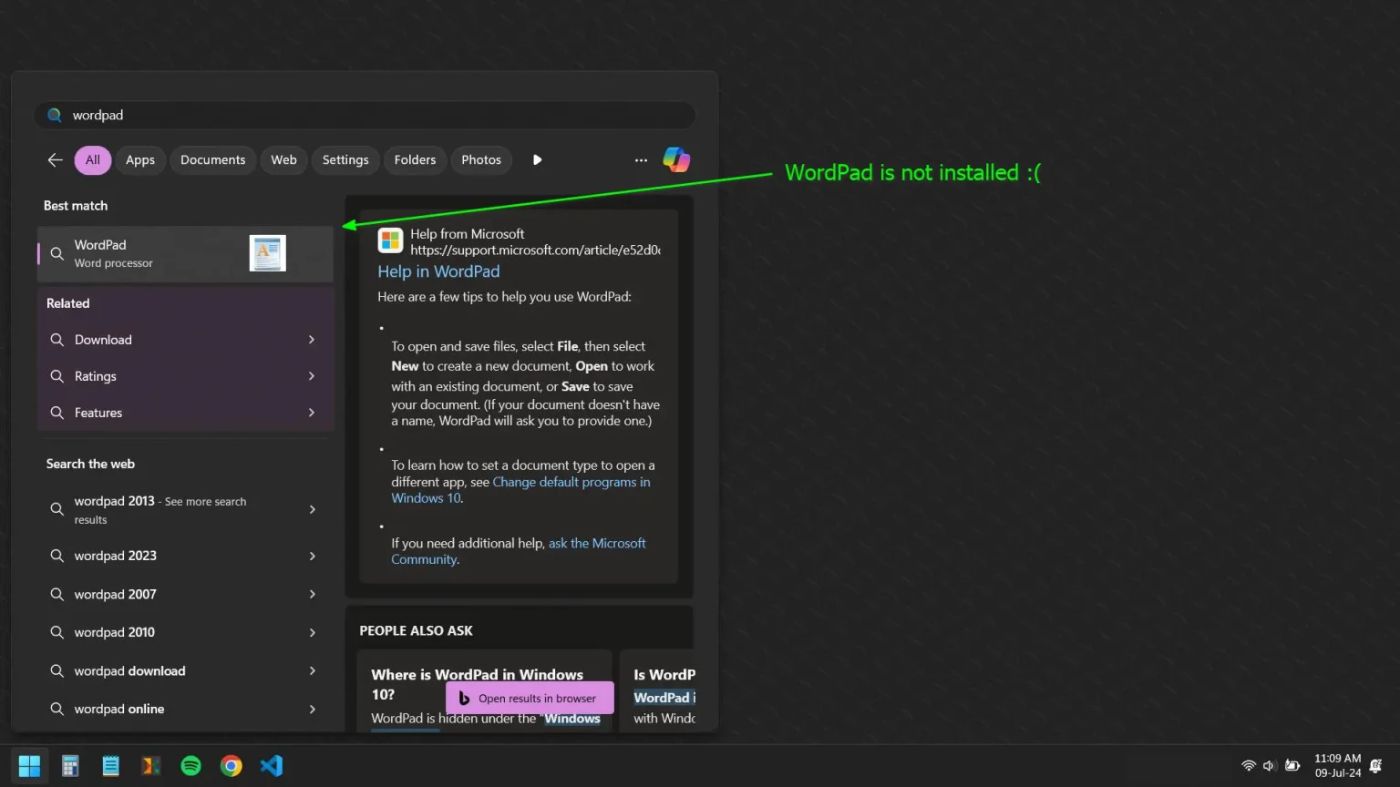
The exact reason behind this removal is unclear, but Microsoft stated that most of its features, including new ones, have been added to Notepad, which is more feature-rich than WordPad and allows users to transition seamlessly.
However, many users didn’t agree, given the fact that WordPad offers more features than any plain text editor, including support for ODF and RTF file formats without requiring additional installation.
Look, there could be many more reasons why users might need the WordPad back, but if the built-in support for ODF and RTF file formats is one reason, then note that you can open and edit these files using Microsoft Word, LibreOffice, or OnlyOffice.
Moreover, if there is any other reason you want the original WordPad back on your Windows 11 and 10 system, then read the entire article to learn how to install WordPad on Windows 11 and 10 in the right way.
How to Install WordPad on Windows 11, 10
Winaero is a popular website that focuses on providing high-quality free apps, themes, and tutorials for Windows. It’s a trusted site that has been serving millions of users since 2011.
It offers the original WordPad package without any tampering and supports both 32-bit and 64-bit systems. If you dislike the app after installation, you can quickly remove it using the uninstaller.
I’ve tried and tested it on my Windows 11 system, and to be frank, it ran just like any other Windows built-in app; to be honest, I kind of liked it—it gives you a nostalgic, childlike feeling.
To quickly install WordPad on Windows 11 and 10, follow these instructions.
-
First, download the WordPad installer for Windows 11 and 10.
-
Once the download is complete, go to the download folder, extract the compressed file, and double-click the extracted file to open the setup wizard (approve the UAC prompt).
-
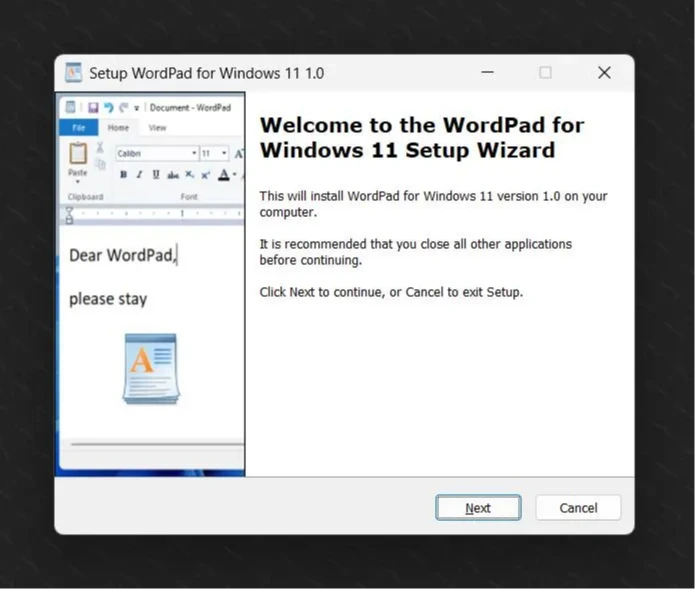
When the setup wizard opens, continue by clicking “Next.“
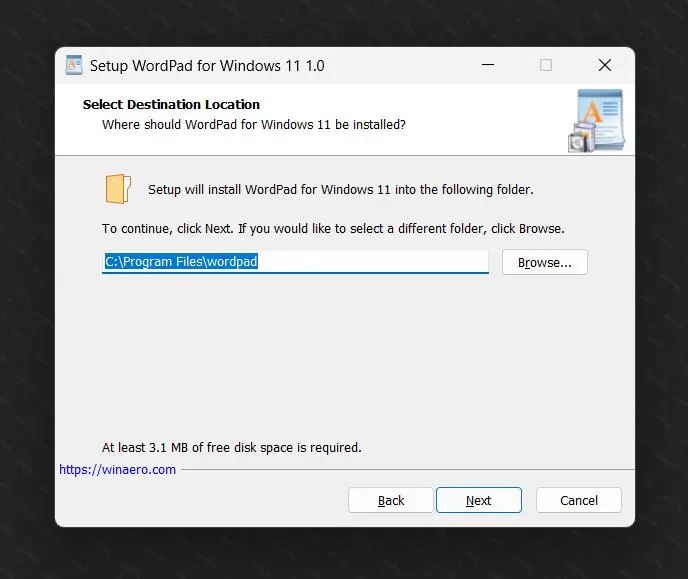
- Next, it displays the default installation location; I recommend not changing it and continuing by clicking “Next.“
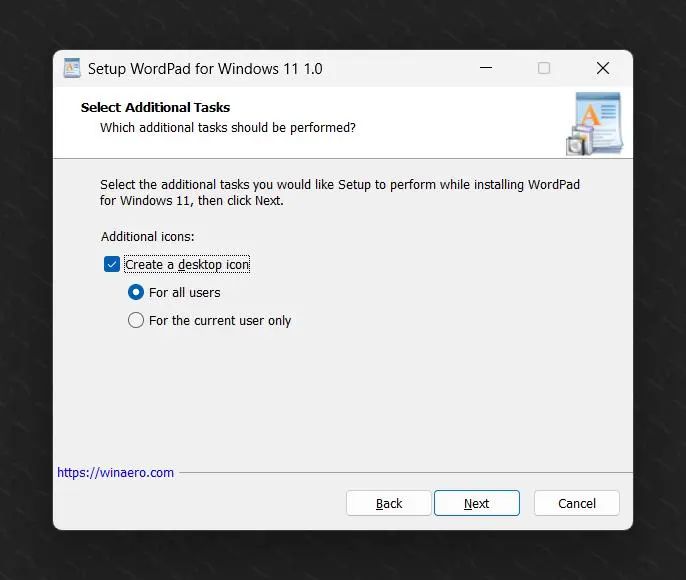
- Here, it will ask whether to install WordPad for the current user or for all users. If you want to install it only for yourself, select the “For the current user only” option. Otherwise, leave the options unchanged, and continue by clicking “Next.“
- Finally, click “Install” to start the WordPad installation.
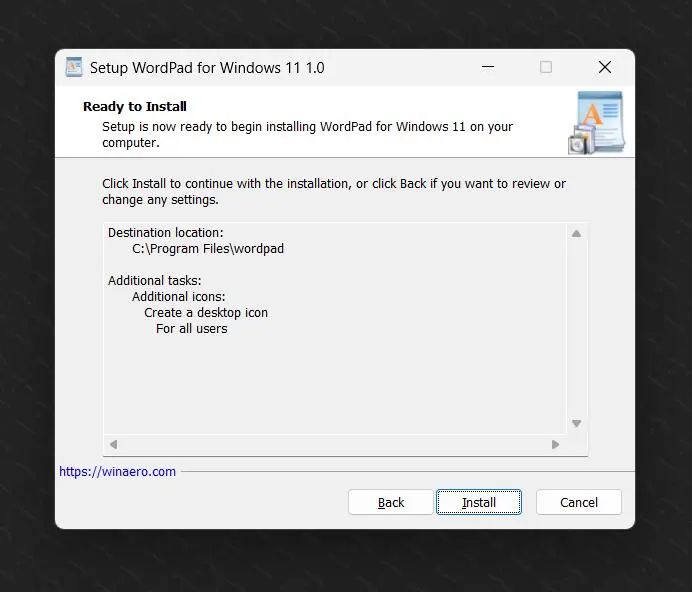
The installation will be completed within 3 to 4 seconds.
- Once the installation is complete, the final finish window will appear, where you can select the “Run WordPad” option to open WordPad immediately after clicking “Finish.“
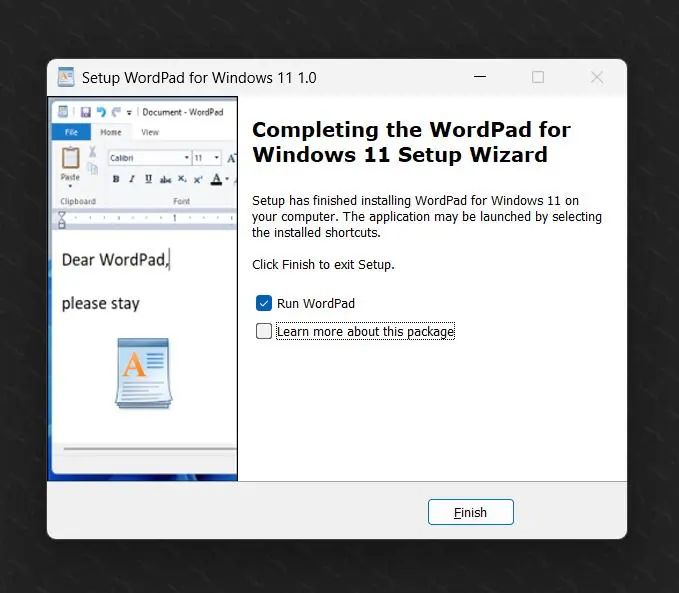
- You can now enjoy WordPad on your Windows 11 and 10 systems.
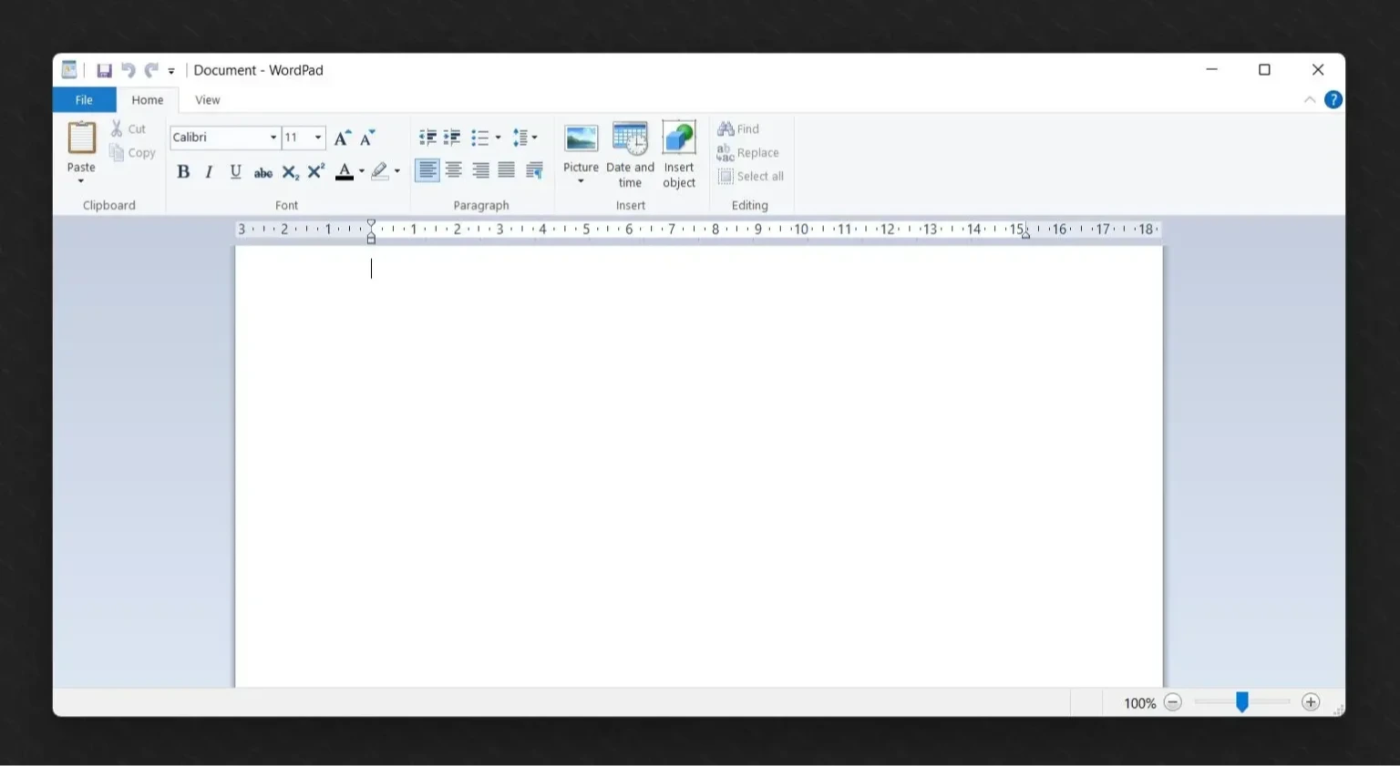
How to Uninstall WordPad on Windows 11, 10
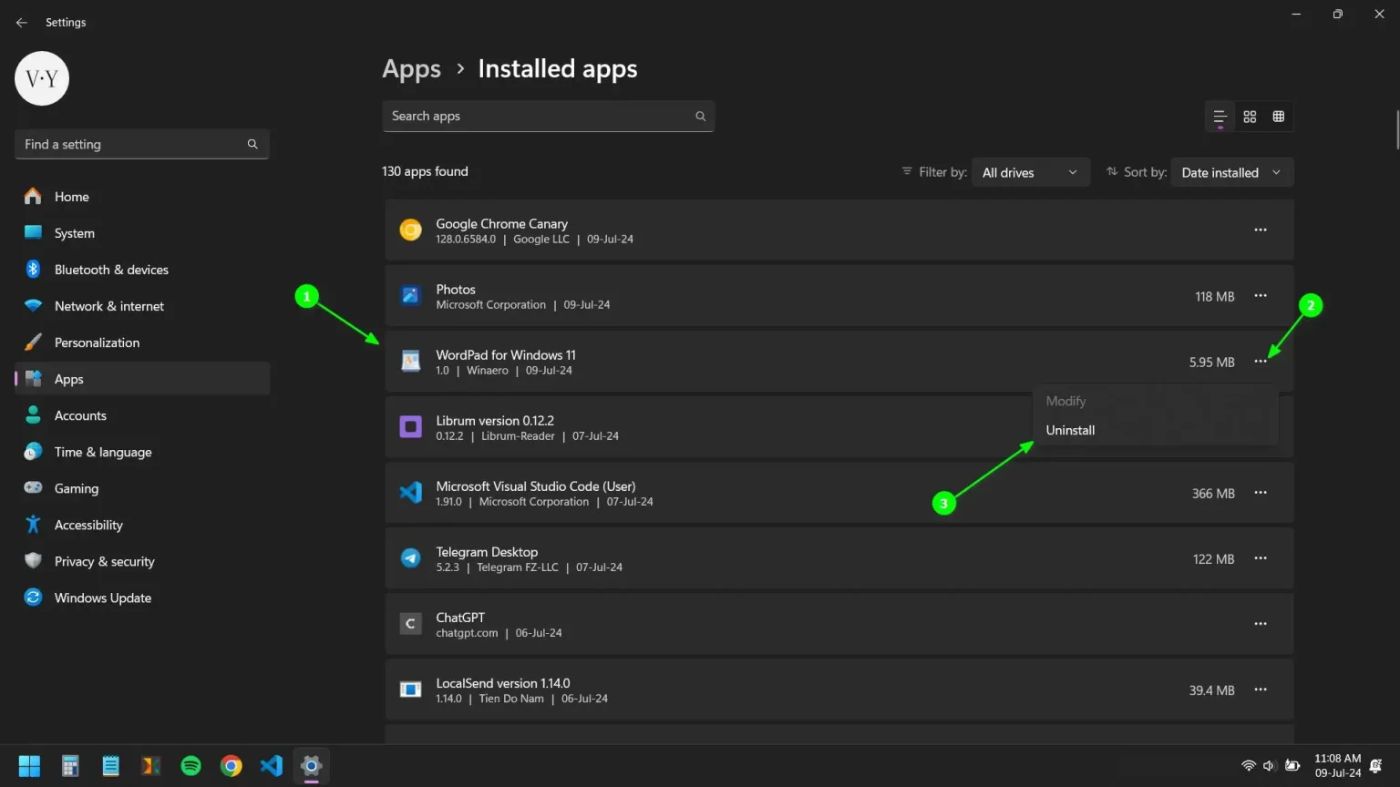
To uninstall WordPad, from Windows 11 and 10, open “Settings“, go to “Apps“, then “Installed apps“, find “WordPad” in the list, click the three dots next to it, and choose “Uninstall” from the menu.
Wrap Up
WordPad has been closest to the hearts of most of the Windows users, including myself. It was one of the first or second Windows apps introduced to me during my childhood. Hearing about its removal left me unaffected, as I have since transitioned to many more advanced editors over the years.
However, while writing this article, I installed and used WordPad for a while, which sparked nostalgic memories from my childhood and created a heartwarming feeling. If you’re a WordPad enthusiast, I hope you found this article useful.

